By the time you’re done reading this post, you’ll know exactly how to prepare yerba mate like a professional cebador (yerba mate server), and can finally start impressing your friends and family with a perfectly prepared gourd of mate.
The traditional method of drinking mate requires delicate care and attention. But in the end, you’re rewarded with a delicious energy-boosting infusion.
Before we get started, you’ll need a few tools…
Yerba Mate Equipment
Mate Gourd
The first thing you’ll need is a gourd (also called a mate).
Gourds come in all shapes, sizes, and materials.
If you want to go the traditional route which I recommend, you’ll need a calabash gourd.
These gourds are made from a squash plant that’s been dried and hollowed out, and have been used for centuries by the indigenous tribes of South America. They produce a drinking experience like no other, and adds a nice natural touch.
Ask anyone who drinks mate what gourd they prefer and most of them will vouch for calabashes. However, they do need to be cured to get rid of all the loose plant material inside which imparts a bitter flavor to the mate.
Keeping with tradition, you may also go for a wooden gourd.
Wooden mate gourds are most commonly made out of palo santo wood (like the one above) or carob (algarrobo) wood. These gourds are 100% natural. What makes them so special – aside from their beautiful woodgrain – is their scent.
Palo santo gourds produce a natural piney aroma while carob gourds have this sweet, citrusy smell you can almost eat.
But the downside is wooden gourds also need to be cured to prevent it from potentially cracking.
Now, if you want to avoid all this hassle with wood and calabash gourds, you can always opt for silicone, ceramic, glass, or even a stainless steel one.
These modern gourds require no treatment so you can get straight to drinking. They’re also more practical and durable than your natural-made gourds. And despite them not being traditional, they’re a lot less prone to molding and a lot easier to clean too. If you’re new, I’d definitely suggest grabbing these gourds first.
Yerba Mate Bombilla
Next, you’ll need a bombilla.
Bombillas (pronounced bom-bee-ya or bom-bee-sha) are a metal straw with a built-in filter that’s used for straining the leaves. Like gourds, they also come in a variety of shapes, sizes, and designs.
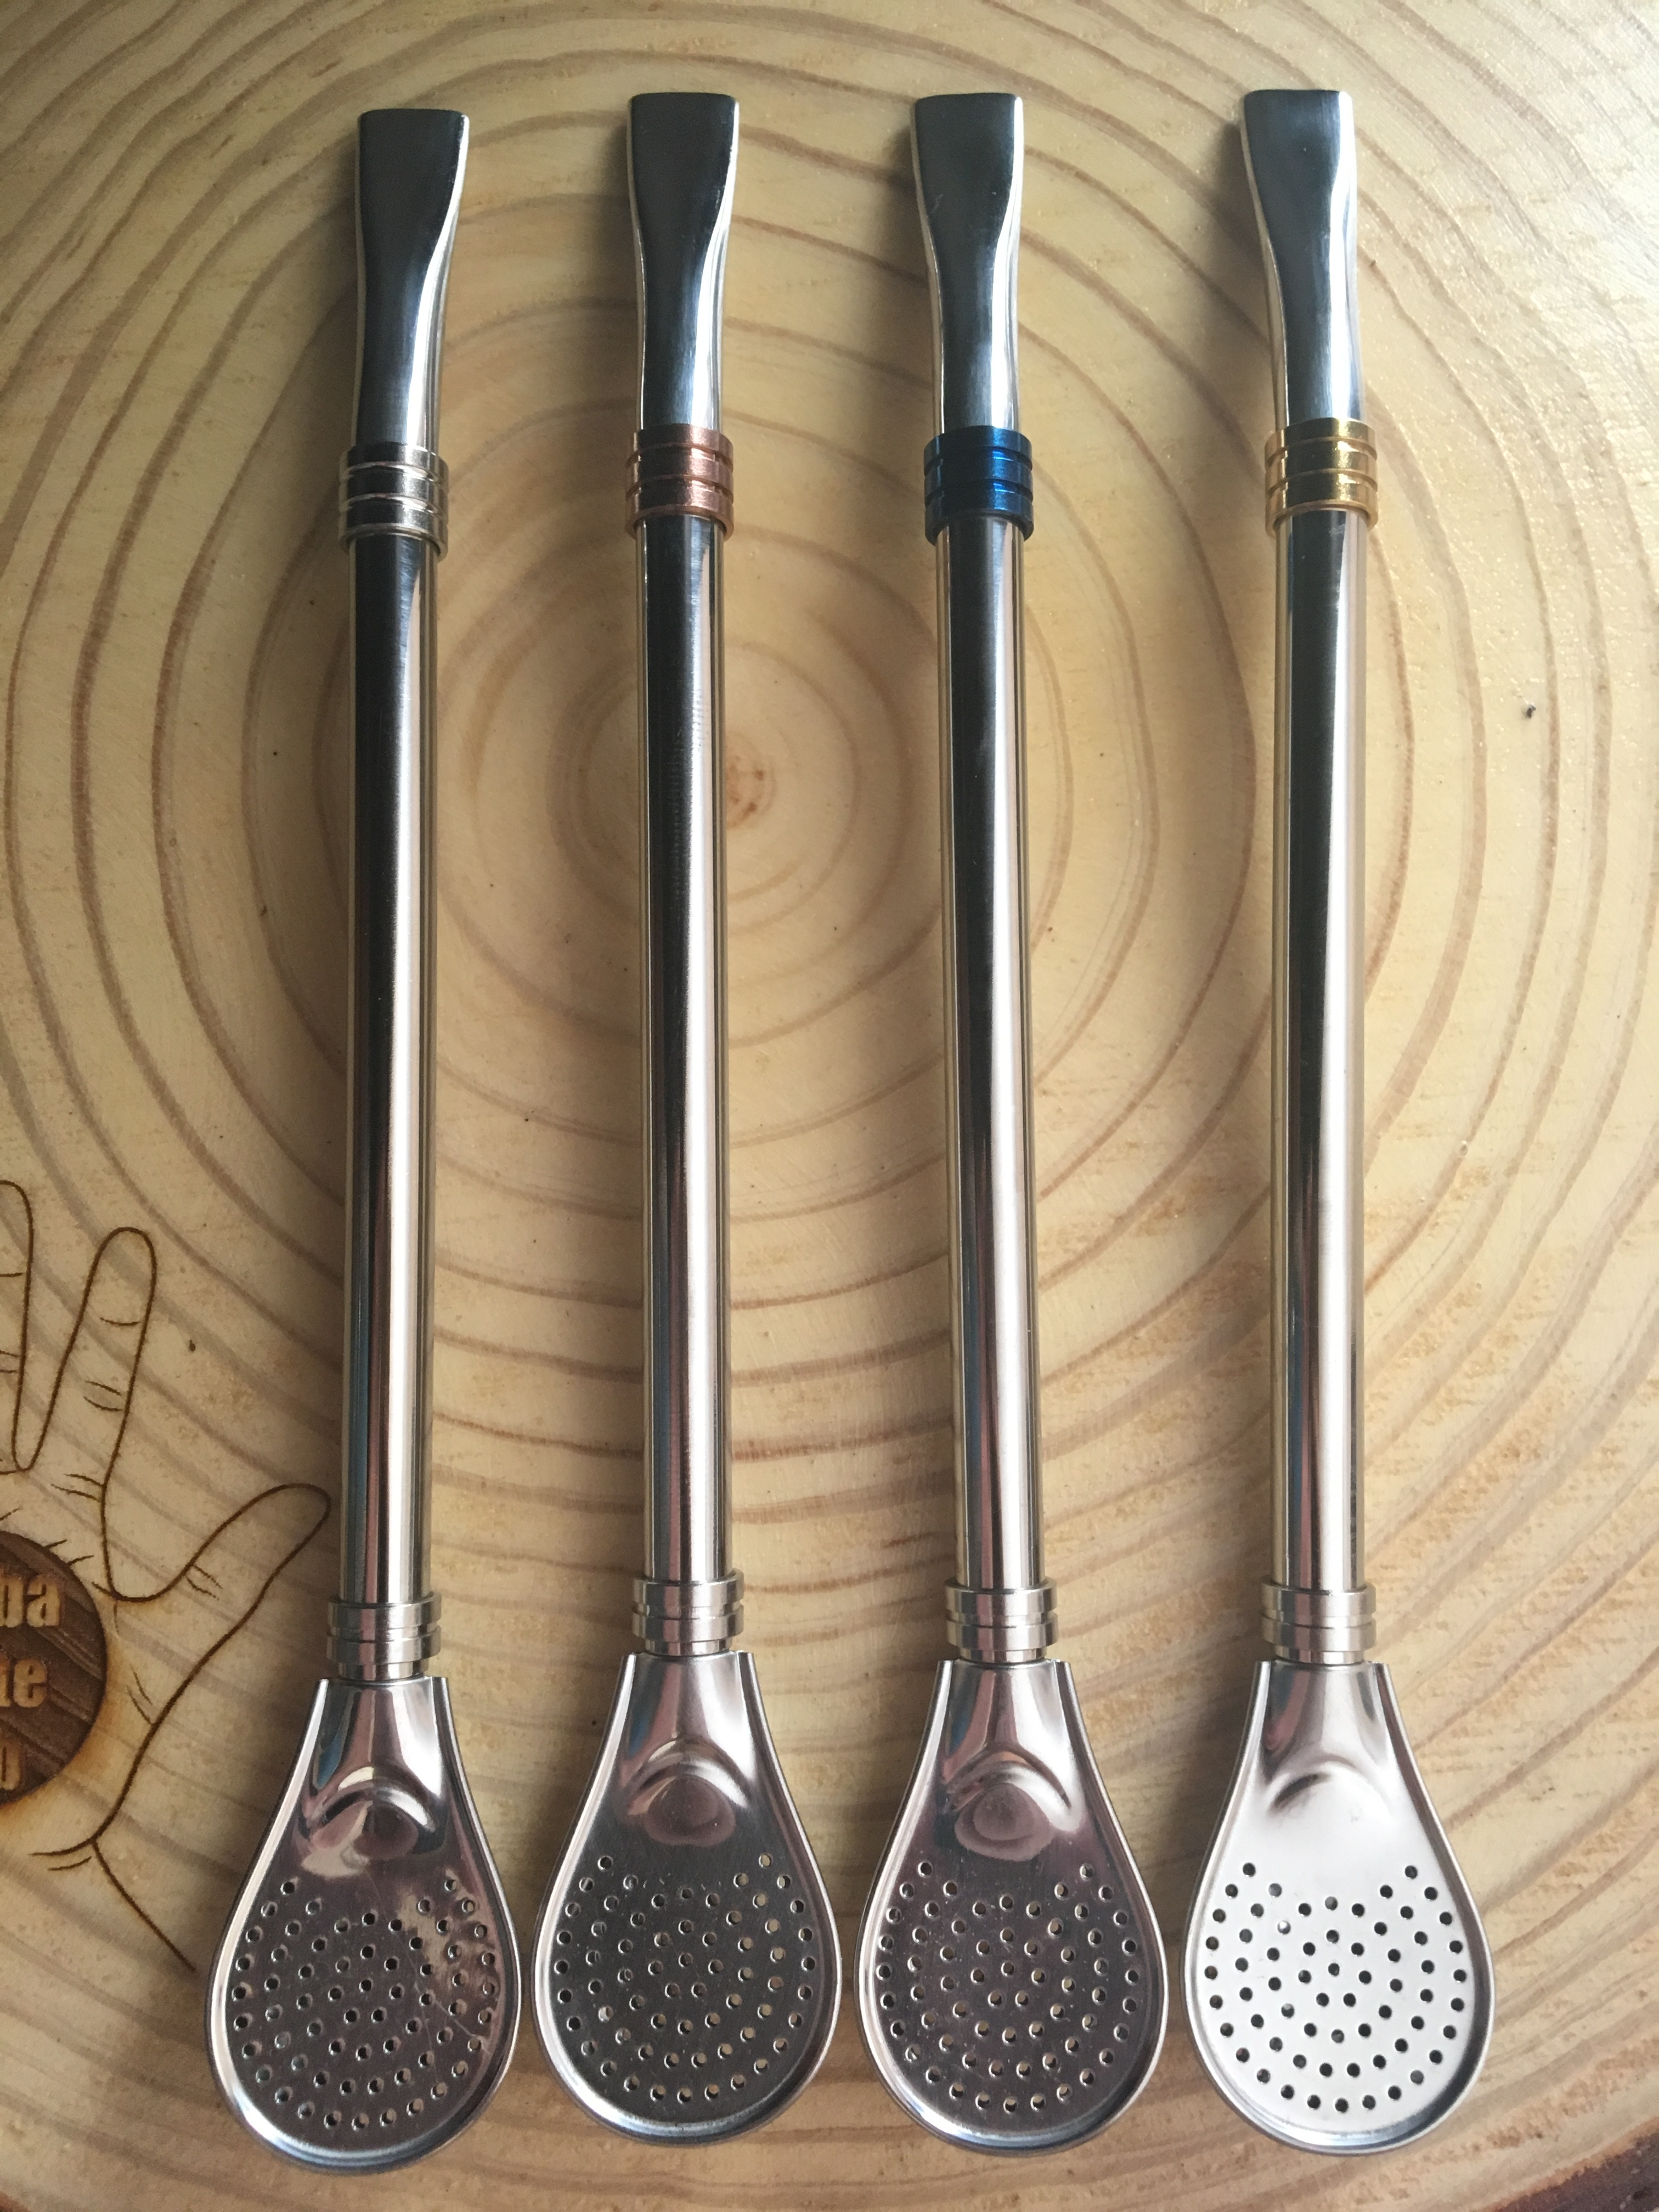
For example, you have coil bombillas which feature a tube with perforated holes covered with a coil or spring. You also have flat bombillas which is just that – flat – with thin slits on each side that act as a filter. Then, there are spoon bombillas which have a spoon-shaped filter filled with tens of tiny little holes.
Spoon bombillas are the best straw for filtering and most practical when it comes to drinking mate as you’ll find with first-hand experience. I suggest everyone drinking mate to have at least one on hand.
Yerba Mate
The last thing you’ll need is obviously some good old yerba mate.
Yerba mate comes from Argentina, Paraguay, Uruguay, and Brazil. Each country has their own unique way of harvesting and processing the plant. Every company also has their own way of cultivating, drying, and aging the yerba which results in hundreds of brands each with a different taste, smell, cut, and more.
Of the tens of brands I’ve been able to review, I can say for a fact that no two brands taste the exact same. Some taste like this, some taste like that. Some are strong, some are mild. And if you’re a beginner, you obviously want to go for a brand that leans more on the mild side.
I always recommend Cruz De Malta for beginners. But some other great beginner-friendly brands include Playadito, Liebig, and Aguantadora. You can’t go wrong with any of these.
Now that you got everything you need, let’s finally learn how to prepare yerba mate.
How to Prepare Yerba Mate (Traditionally)
Step 1: Heat water to 140º-170ºF (60º-77ºC).
Never use boiling water. Boiling water scalds the leaves and makes the mate taste extremely bitter. You also risk cracking your glass, calabash or wooden gourd.
When it comes to yerba mate, there isn’t a specific temperature to drink it. Different brands taste better at different temperatures. The above range is just a general guideline. You can go higher or lower if you want, but I don’t recommend it. The best rule of thumb to follow is to simply drink at whatever temperature is most comfortable for you.
Step 2: Fill your mate gourd 1/2 – 2/3 of the way with your yerba of choice.
Step 3: Cover the gourd with your palm, turn it upside down, and shake.
Doing this moves the larger particles (leaves and stems) to the bottom of the gourd and the smaller particles (dust/powder) to the top of the gourd. This way, you don’t suck up small bits through the bombilla.
You’ll get some of the yerba mate dust on your hands, but just blow it off or rub it on your pants. Whatever you prefer.
Step 4: Tilt the gourd back at a 45º angle.
This will help you form a slope or mountain of mate. Your gourd should now be half empty and the other half filled with yerba.
Step 4: Pour room temperature water in the empty half.
Fill until the water reaches about half of the mountain. Then wait a minute or two for the leaves to absorb and expand. This helps with filtration since the leaves swell and become more pliable instead of firm and dry.
Step 5: Insert the bombilla.
Starting from the water side, insert the bombilla until you reach the bottom of the gourd. Then position it under the mountain of mate by pulling the straw towards you. This might take a bit of force so be careful not to be too aggressive or the mountain will tip over.
Once your bombilla is under the mate, the straw should rest firmly against the brim of your gourd.
Step 6: Pour hot water into your thermos and fill your gourd.
Using your thermos, pour the hot water into the same half as your bombilla just before it reaches the top of the mountain. What you’ll end up with is one half that’s wet and the other half that’s dry. We don’t saturate all the leaves at once because the taste can be too strong, and also because it helps prolong the mate.
Step 7: Take a sip!
After filling your gourd, you don’t need to let it steep. The second it’s filled, you can start sipping. Letting it steep for even a few minutes will make the infusion too strong and bitter. Only after multiple refills will you need to let it steep as the leaves lose most of its flavor by that point.
You’ll know you need a refill once you hear your bombilla make a slurping sound.
As you continue refilling your gourd, at some point, you’ll notice the mate starts to lose flavor. Once that happens, you can slowly begin wetting the dry leaves on the other half.. Keep doing so until all the leaves are soaked. When the mate has absolutely no more flavor, it’s finished and you may start cleaning your gourd.
If you need more clarification on how to prepare yerba mate, watch me prepare it in the video below!
Other Ways To Make Yerba Mate
Although I recommend drinking yerba mate the traditional way, it’s not the only way.
You can make yerba mate just how you make any other tea. Whether it be with a tea strainer, tea pot, french press, or even a coffee maker, these are all viable options. Simply use 1 tablespoon of yerba per 8 ounces of water, let it steep for 3-5 minutes, and presto! Again, the only thing you need to remember is to never use boiling water.
You can also drink yerba mate tea bags. I personally find tea bags to be too mild for my taste. But if you’re a beginner, they can be a easy way to get your palate accustomed to mate. Just steep one tea bag per 8 ounces of water and you’re ready to go.
Final Words
You now know how to prepare yerba mate the traditional way!
Like most things, it takes practice to get it right.
If it’s your first time, expect to make some mistakes. I know I did. You might pour in water that’s too hot. Your mountain of mate might not look too pretty. And you might position the bombilla incorrectly and suck up bits of leaves. Whatever it is, don’t worry. Just keep doing it until you get the hang of it.
Eventually, you’ll be able to prepare a smooth-running mate each and every time.
P.S. If you found this post helpful, you might want to check out our store because we offer mate gourds and bombillas that you’ll love.


Good site you have got here.. It’s hard to find high quality writing like yours nowadays. I truly appreciate individuals like you! Take care!!
You sure know what you’re talking about. Everyone is going to soon be visiting your site.
The instructions should say to heat the water, not boil it. If the water comes to a boil, then it’s at least 212 degrees fahrenheight (100 celcius). People may burn themselves if they actually boil the water.
Hi Daniel,
Thanks for your comment.
You are right, but that’s why I clarified the specific temperatures you should heat the water to in the next sentence.
Cheers,
Darren
I just jumped into yerba maté life. I appreciate such a wonderful writings. I don’t have calabash but I have silicone one. I can’t wait I’ll try it soon using this method.
I just found this site and I want to thank you for all the wonderful information you’ve provided. I’m brand new to drinking yerba mate, and this site has educated me greatly. What fun!!
Hey Janice,
Thanks for the kind words! I love hearing about your interest in yerba mate. Hope you find everything you need here. Any questions, just let me know.
Cheers to your journey,
Darren
So I bought a high end mate gourd and bombilla in this online shop after watching Darren’s amazing YouTube videos. I had the tools for a while and finally the Yerba came in. After watching a video on how to brew, I drank it and while I knew it was bitter… it was BITTER haha, but I came from coffee and espresso drinking alone so it wasn’t too big of a surprise. I read this guide after my 3rd refill and I’m glad I’ve found out that I’ve been preparing the refills wrong. I thought there had to be some diffusion because in my mind, tea and leafy stuffs need time to give water flavor. Well yeah I can say it is true your first 4 refills at least will be the most ready to consume right away, unless you want that sharpness… despite it being big on tannins, I can still taste most of the notes that you’ve written on your post of “Cruz de Malta”.
Thank you Darren for giving me something additionally interesting to do in my life.
-Lince
Hey Lince,
Thank you very much for the kind words!
Glad I could be a helping hand and kick-start your journey into the world of yerba mate. Keep on sipping!
Cheers,
Darren
i tried this just the way you recommended,,, It was delicious
,,,